Install instructions for additional nodes in Windows and Linux.
Windows
If Workbench data and configuration redundancy and service high availability is required, Genesys recommends a 3+ (3 minimum Multi/Cluster) Node/Host Workbench deployment.
WARNING
- Before commencing these Workbench Additional Node instructions, ensure the Workbench Primary Node has been successfully installed
- Workbench supports a 1 or N (minimum 3 with odd number increments) Node architecture
- Deploying only a Workbench Primary and Workbench Node 2 architecture will cause future upgrade issues likely resulting in a reinstall of Workbench
Repeat these steps for any additional nodes desired.
- On the respective 2nd Workbench Additional Node/Host, extract the downloaded Workbench installation compressed zip file.
- Within the extracted folder, open a Command/Powershell Console As Administrator and run install.bat.
- Click Next on the Genesys Care Workbench 9.x screen.
- Review and if you agree click Accept on the Term's & Condition's screen.
- Select New Installation on the Workbench Installation Mode screen.
- Click Next.
- On the Workbench Installation Type screen, select Additional Node.
- If required, change from the default Default installation to Custom (complete the Custom config according to your needs).
- Click Next.
- On the Base Workbench Properties screen, provide the Workbench Home Location folder where Workbench components will be installed (i.e. " C:\Program Files\Workbench_9.1.000.00").
- Review the network Hostname - this should be accessible/resolvable within the domain.
- Click Next.
- On the Additional Components To Be Installed screen, ensure the Workbench Elasticsearch option is are checked (for HA of the ingested Workbench data ,e.g., Alarms, Changes, Channel Monitoring, etc.).
- Ensure the Workbench ZooKeeper option is checked (for HA of the Workbench configuration settings).
- NOTE: Workbench ZooKeeper Cluster supports a maximum of 5 Nodes.
- If required, based on the Planning/Sizing exercise, ensure the Workbench Logstash option is checked.
- Workbench Agent is checked by default; it's a mandatory requirement for any hosts running Workbench 9.x components.
- Provide the Primary Node ZooKeeper IP and Port - i.e. 10.20.30.1:2181.
- WARNING: Due to a Port validation limitation, please ensure the ZooKeeper Port is correct before pressing Enter; a race-condition could occur if not correctly entered.
- Click Next
- Click Next on the Service Account screen.
- NOTE: Unless Network Account is required.
- Click Install.
- Click OK on the Finished dialog.
- Click Exit.
Checkpoint
NOTE
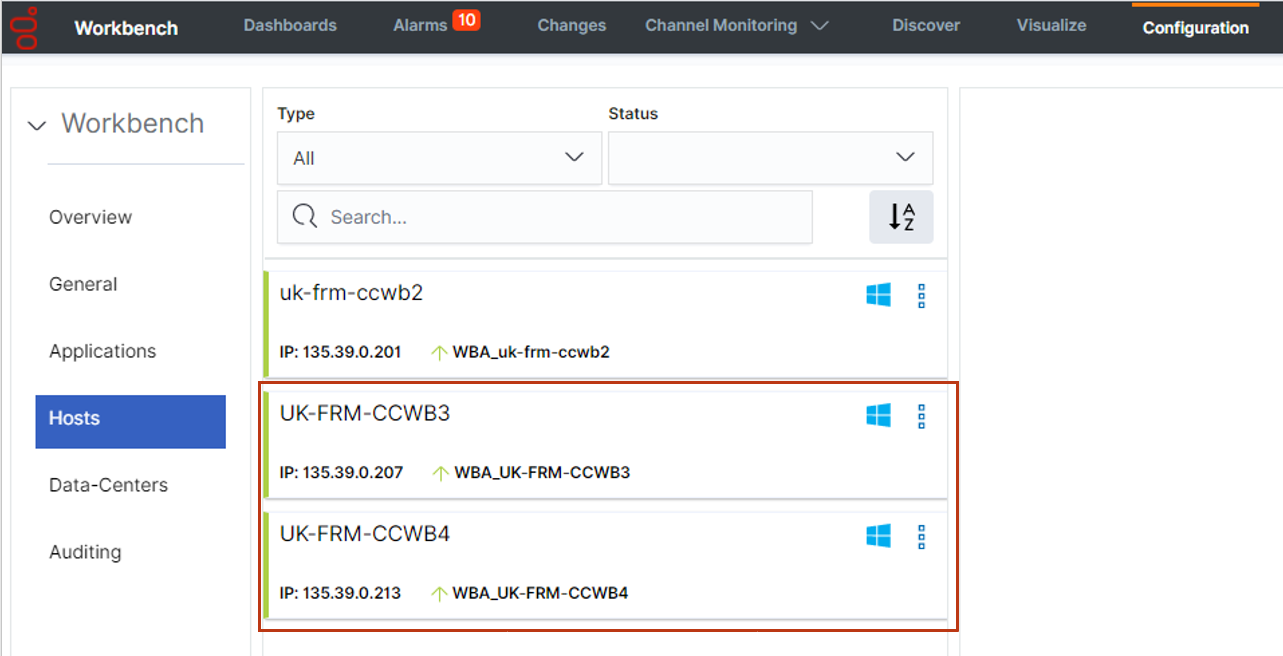
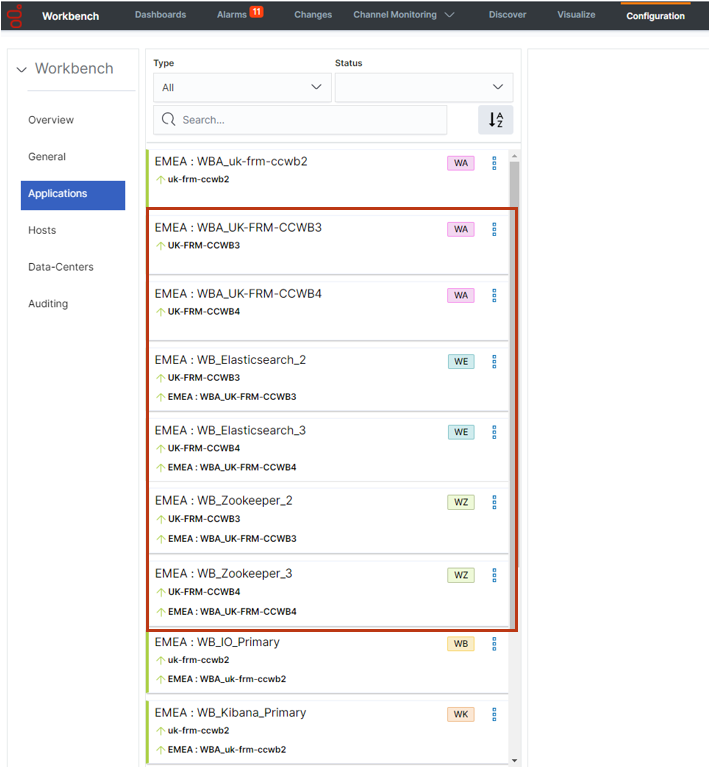
- Based on the instructions above, within the Workbench Configuration\Hosts and Workbench Configuration\Applications menus there should now be additional Hosts and Applications
- The number of additional workbench Hosts and Applications will vary based on your sizing architecture and the selections you made during the installation of additional components
- Currently additional Workbench components have been installed on their respective Hosts, the next step is to form the Workbench Cluster which will provide HA of ingested event data (Workbench Elasticsearch) and HA of Workbench Configuration data (Workbench ZooKeeper).
- Do not form the Workbench Cluster until all Workbench Additional Nodes have had their additional respective components installed
As an example, following the installation of Workbench Additional Node 2 and Node 3, the additional Hosts and Applications are highlighted below:
Hosts
Applications
ZooKeeper cluster configuration
Workbench ZooKeeper Cluster supports a maximum of 5 Nodes.
WARNING
- Before configuring the Workbench ZooKeeper Cluster, ensure ALL Workbench Additional Node components have been installed
NOTE
- Before configuring the Workbench Cluster, ensure ALL Workbench Agent and Workbench ZooKeeper components are Up (Green)
- For the Workbench ZooKeeper configuration, use IP Address:PORT and not Hostname:Port
- Workbench ONLY supports ODD number of additional nodes (i.e. 1, 3, 5 etc) within a Workbench Cluster architecture
- Ensure ALL "N" Workbench Additional Nodes are installed/configured before forming the final Workbench Cluster
- Workbench does not support scaling post Workbench Cluster formation.
- For example, if you form a 3 Node Workbench ZooKeeper Cluster, you cannot increase to a 5 Node ZooKeeper Cluster - as such please ensure your Workbench planning and sizing is accurate before completing your Workbench ZooKeeper Cluster formation, else a reinstall may be required
- Navigate to the Primary ZooKeeper application, i.e. EMEA : WB_ZooKeeper_Primary
- Expand Configuration Section 4.Cluster Configuration
- In the Node 1 field enter the Primary Workbench ZooKeeper Hostname <IPAddress>:2888:3888
- In the Node 2 field enter the Workbench Additional ZooKeeper Node 2 Hostname <IPAddress>:2888:3888
- In the Node 3 field enter the Workbench Additional ZooKeeper Node 3 Hostname <IPAddress>:2888:3888
- Click Save.
NOTE
- Wait for 3 minutes and refresh (F5) the Chrome Browser
- Workbench 9 should now have a Workbench ZooKeeper clustered environment providing HA of Workbench Configuration
Elasticsearch clusters
Configuration
WARNING
- Before configuring the Workbench Elasticsearch Cluster, ensure ALL Workbench Additional Node components have been installed
NOTE
- Before configuring the Workbench Cluster, ensure ALL Workbench Agent and Workbench Elasticsearch components are Up (Green)
- Fully Qualified Domain Name (FQDN) is NOT supported - either use Hostname or IP Address and not FQDN
- Workbench ONLY supports odd number of additional nodes (i.e. 1, 3, 5, 7, 9 etc) within a Cluster deployment
- Ensure ALL "N" Additional Nodes are installed before forming the final Workbench Cluster
- Workbench does not support scaling post Workbench Cluster formation
- For example, if you form a 3 Node Workbench Elasticsearch Cluster, you cannot increase to a 5 Node Elasticsearch Cluster - as such please ensure your Workbench planning and sizing is accurate before completing your Workbench Elasticsearch Cluster formation, else a reinstall may be required
- Navigate to the Primary Elasticsearch application, i.e. EMEA : WB_Elasticsearch_Primary.
- Expand Configuration Section 6.Workbench Elasticsearch Discovery.
- In the Discovery Host(s) field enter the value from the associated Section 5 - [Workbench Elasticsearch Identifiers/Network Host] field of ALL Elasticsearch applications (i.e. WB-1,WB-2,WB-3).
- Click Save.
Test the health status of the cluster
There are three ways to check the health status of the Elasticsearch cluster.
NOTE
Where <WB-VM-X> is the Workbench Primary, Node 2 or Node 3 Host.
Via the web
- In a Chrome Browser navigate to:
- http://<WB-VM-X>:9200/_cluster/health?pretty
Via PowerShell curl
- Run the cmdlet:
- curl -Uri "<WB-VM-X>:9200/_cluster/health?pretty"
Via Linux curl
- Execute:
- curl "http://<WB-VM-X>:9200/_cluster/health?pretty"
Expected output
Elasticsearch Cluster health should be reporting Green.
{
 "cluster_name" : "GEN-WB-Cluster",
 "status" : "green",
 "timed_out" : false,
 "number_of_nodes" : 3,
 "number_of_data_nodes" : 3,
 "active_primary_shards" : 29,
 "active_shards" : 58,
 "relocating_shards" : 0,
 "initializing_shards" : 0,
 "unassigned_shards" : 0,
 "delayed_unassigned_shards" : 0,
 "number_of_pending_tasks" : 0,
 "number_of_in_flight_fetch" : 0,
 "task_max_waiting_in_queue_millis" : 0,
 "active_shards_percent_as_number" : 100.0
}
Linux
Repeat these steps for any additional nodes desired.
- On the respective 2nd Workbench Additional Node/Host.
- Run tar zxf Workbench_9.x.xxx.xx_LINUX.tar.gz to extract the downloaded Workbench_9.x.xxx.xx_LINUX_Pkg.tar.gz compressed file.
- Navigate into the ip\linux folder.
- Run tar zxf Workbench_9.x.xxx.xx_Installer_Linux.tar.gz - to extract the Workbench_9.x.xxx.xx_linux.tar.gz compressed tar file.
- Run the command ./install.sh (DO NOT prefix ./install.sh with sudo).
- On the Genesys Care Workbench 9.x.
- Press Enter to continue.
- License Agreement.
- Press Enter to view the Term’s & Conditions.
- Review the Term’s & Conditions/License Agreement.
- Press Enter to scroll to the end.
- Or press N and Enter to review on a page-by-page basis.
- Press Enter (default=Y) to accept the T&C's/license agreement and continue with the installation if you agree to the T&C's.
- On the Installation Mode screen.
- Press Enter for New Installation (default).
- On the Installation Type screen.
- Press 2 and Enter for Additional Node.
- On the DEFAULT or CUSTOM screen.
- Press Enter to continue with the respective Workbench components Default settings (binaries/paths, config, ports, etc.).
- Or Press 2 and Enter to provide Custom settings (binaries/paths, config, ports, etc.).
- On the Base Workbench Properties - Workbench Home Location screen.
- Press Enter to accept the default installation path of /opt/Genesys/Workbench_9.x.xxx.xx.
- Or type the new installation path (i.e. /home/genesys/gcti/WB9.x.xxx.xx).
- On the Base Workbench Properties - Hostname screen.
- Review the Hostname automatically populated by the Workbench installer.
- On the Additional Components To Be Installed - - Workbench Elasticsearch screen.
- Press [y/Y] and Enter to install Workbench Elasticsearch on this host/node or Press Enter to skip (default) installation of this component.
- On the Additional Components To Be Installed - Workbench ZooKeeper screen.
- Press [y/Y] and Enter to install Workbench ZooKeeper on this host/node or Press Enter to skip (default) installation of this component.
- On the Additional Components To Be Installed - Workbench Logstash screen.
- Press [y/Y] and Enter to install Workbench Logstash on this host/node or Press Enter to skip (default) installation of this component.
- On the Additional Components To Be Installed - Workbench Primary ZooKeeper IP Address/Port screen.
- Type the Primary ZooKeeper IP:PORT (i.e. 10.20.30.40:2181) and press Enter.
- The Workbench Additional Node installation will now progress.
- The Workbench Additional Node installation is complete.
Checkpoint
NOTE
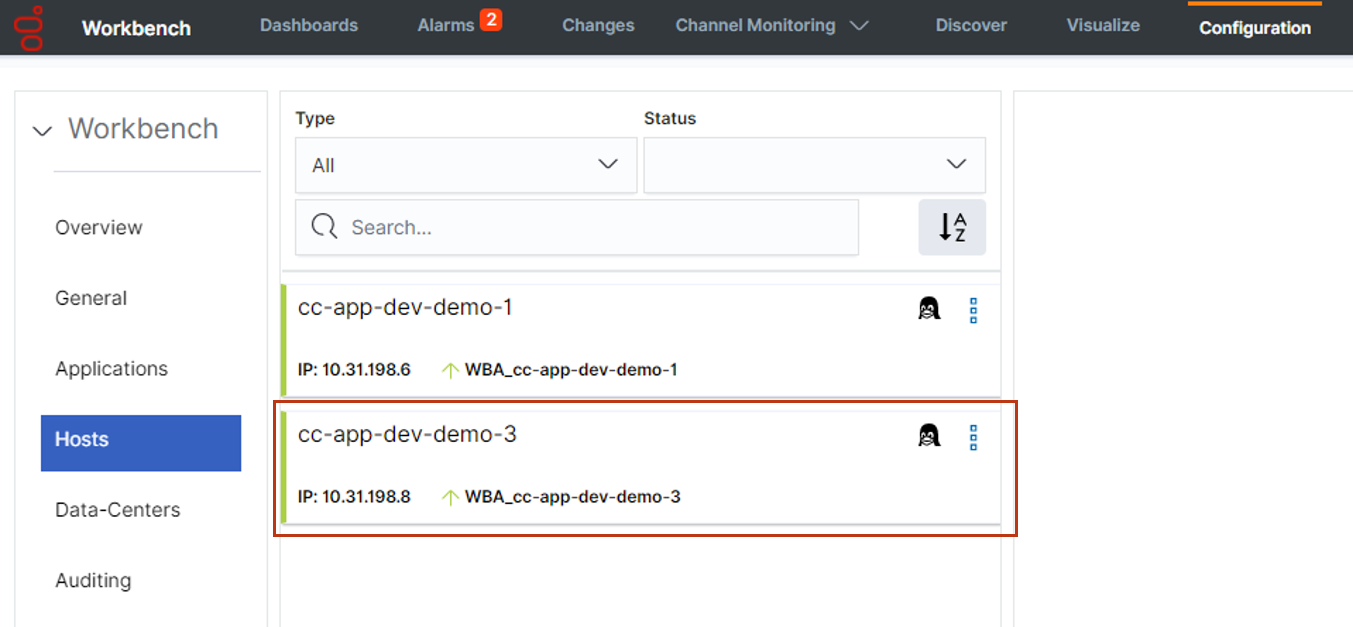
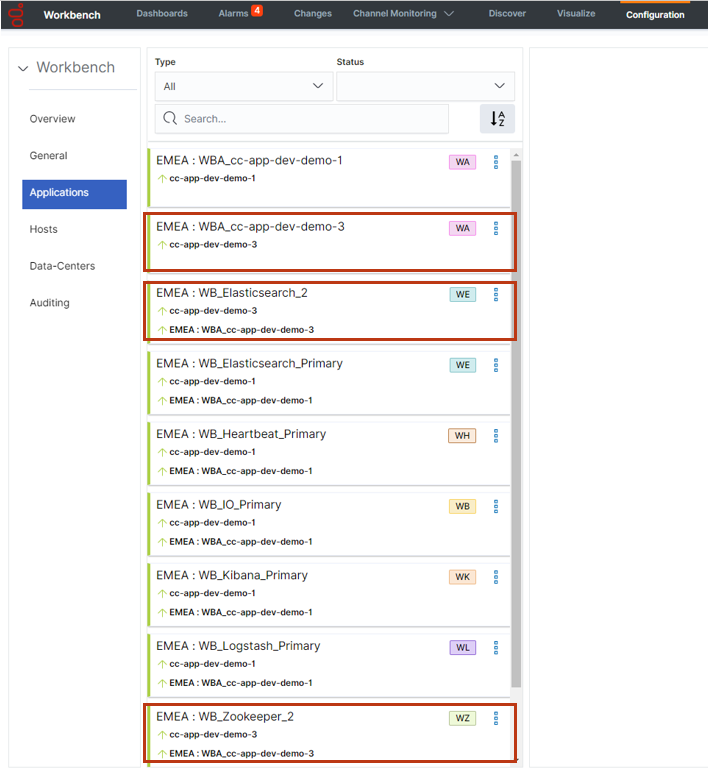
- Based on the instructions above, within the Workbench Configuration\Hosts and Workbench Configuration\Applications menus there should now be additional Hosts and Applications
- The number of additional Workbench Hosts and Applications will vary based on your sizing architecture and the selections you made during the installation of additional components
- Currently additional Workbench components have been installed on their respective Hosts, the next step is to form the Workbench Cluster which will provide HA of ingested event data (Workbench Elasticsearch) and HA of Workbench Configuration data (Workbench ZooKeeper).
- Do not form the Workbench Cluster until all Workbench Additional Nodes have had their additional respective components installed
As an example, following the installation of Workbench Additional Node 2, the additional Hosts and Applications are highlighted below:
Hosts
Applications
ZooKeeper cluster configuration
WARNING
- Before configuring the Workbench ZooKeeper Cluster, ensure ALL Workbench Additional Node components have been installed
NOTE
- Before configuring the Workbench Cluster, ensure ALL Workbench Agent and Workbench ZooKeeper components are Up (Green)
- For the Workbench ZooKeeper configuration, use IP Address:PORT and not Hostname:Port
- Workbench ONLY supports ODD number of additional nodes (i.e. 1, 3, 5 etc) within a Workbench Cluster architecture
- Ensure ALL "N" Workbench Additional Nodes are installed/configured before forming the final Workbench Cluster
- Workbench does not support scaling post Workbench Cluster formation
- For example, if you form a 3 Node Workbench ZooKeeper Cluster, you cannot increase to a 5 Node ZooKeeper Cluster - as such please ensure your Workbench planning and sizing is accurate before completing your Workbench ZooKeeper Cluster formation, else a reinstall may be required
- Navigate to the Primary ZooKeeper application, i.e. EMEA : WB_ZooKeeper_Primary.
- Expand Configuration Section 4.Cluster Configuration.
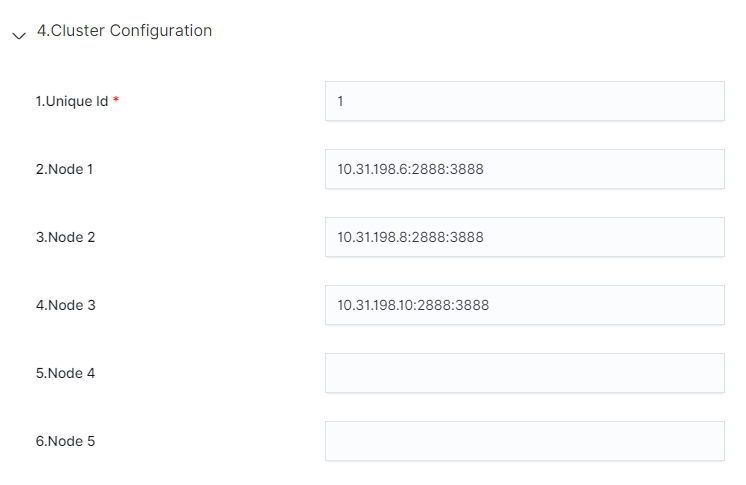
- In the Node 1 field enter the Primary Workbench ZooKeeper Hostname <IPAddress>:2888:3888.
- In the Node 2 field enter the Workbench Additional ZooKeeper Node 2 Hostname <IPAddress>:2888:3888.
- In the Node 3 field enter the Workbench Additional ZooKeeper Node 3 Hostname <IPAddress>:2888:3888.
- Click Save.
NOTE
- Wait for 3 minutes and refresh (F5) the Chrome Browser
- Workbench 9 should now have a Workbench ZooKeeper clustered environment providing HA of Workbench Configuration
An example Workbench Cluster Configuration being:
WARNING
- Workbench ZooKeeper Cluster supports a maximum of 5 Nodes
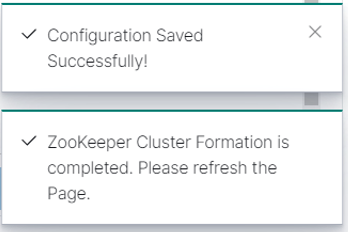
After clicking Save the ZooKeeper Cluster formation process will progress and complete:
Elasticsearch cluster configuration
WARNING
- Before configuring the Workbench Elasticsearch Cluster, ensure ALL Workbench Additional Node components have been installed
NOTE
- Before configuring the Workbench Cluster, ensure ALL Workbench Agent and Workbench Elasticsearch components are Up (Green)
- Fully Qualified Domain Name (FQDN) is NOT supported - either use Hostname or IP Address and not FQDN
- Workbench ONLY supports odd number of additional nodes (i.e. 1, 3, 5, 7, 9 etc) within a Cluster deployment
- Ensure ALL "N" Additional Nodes are installed before forming the final Workbench Cluster
- Workbench does not support scaling post Workbench Cluster formation
- For example, if you form a 3 Node Workbench Elasticsearch Cluster, you cannot increase to a 5 Node Elasticsearch Cluster - as such please ensure your Workbench planning and sizing is accurate before completing your Workbench Elasticsearch Cluster formation, else a reinstall may be required
- Navigate to the Primary Elasticsearch application, i.e. EMEA : WB_Elasticsearch_Primary
- Expand Configuration Section 6.Workbench Elasticsearch Discovery
- In the Discovery Host(s) field enter the value from the associated Section 5 - [Workbench Elasticsearch Identifiers/Network Host] field of ALL Elasticsearch applications (i.e. WB-1,WB-2,WB-3)
- Click Save
Example:
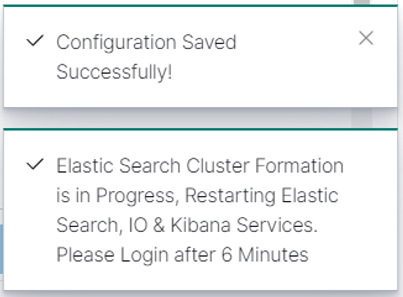
Post clicking ''Save'' you will see the popup notification below:
NOTE
- Logout of Workbench (Chrome Browser session)
- Wait for a minimum of 6 minutes for the Workbench Elasticsearch Cluster formation to complete
- Login to Workbench
- Workbench 9 should now have a Workbench Elasticsearch Clustered environment providing HA of Workbench ingested event data
Test the health status of the cluster
There are three ways to check the health status of the Elasticsearch cluster.
NOTE
Where <WB-VM-X> is the Workbench Primary, Node 2 or Node 3 Host.
Via the web
- In a Chrome Browser navigate to:
- http://<WB-VM-X>:9200/_cluster/health?pretty
Via PowerShell curl
- Run the cmdlet:
- curl -Uri "<WB-VM-X>:9200/_cluster/health?pretty"
Via Linux curl
- Execute:
- curl "http://<WB-VM-X>:9200/_cluster/health?pretty"
Expected output
Elasticsearch Cluster health should be reporting Green.
{
 "cluster_name" : "GEN-WB-Cluster",
 "status" : "green",
 "timed_out" : false,
 "number_of_nodes" : 3,
 "number_of_data_nodes" : 3,
 "active_primary_shards" : 29,
 "active_shards" : 58,
 "relocating_shards" : 0,
 "initializing_shards" : 0,
 "unassigned_shards" : 0,
 "delayed_unassigned_shards" : 0,
 "number_of_pending_tasks" : 0,
 "number_of_in_flight_fetch" : 0,
 "task_max_waiting_in_queue_millis" : 0,
 "active_shards_percent_as_number" : 100.0
}
